


My daughter wanted to store her craft and sewing in a box, so I suggested we decoupage a large vintage suitcase with pictures that are inspirational to her.
Here are the steps to decoupaging a vintage suitcase.
What you will need:
- Magazines
- Scissors
- Craft glue
- Vintage suitcase
- Small paint brush
- Clear paint spray or decoupage clear gloss
1. Pick your item
First you need to pick which vintage suitcase you want to use. Pick one that closes up securely and is big enough for all your items.
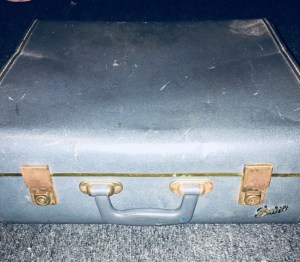
Above: The vintage suitcase we chose to use
2. Cut out your pictures
Get some of your favourite magazines and cut out some inspirational pictures. You can also download images, use newspaper, music sheets, concert tickets, photos, children’s drawings, or any paper items. The possibilities are endless!!
Trim each picture to not overlap. Then set them out on your suitcase as to what looks the most aesthetically pleasing for you!

Above: magazines to use to cut out pictures

Above: cut out inspirational pictures
3. Glue your pictures
Use a strong craft glue and stick your pictures on. With a small paint brush, spread the glue out evenly on the back of the picture. Glue the images where you prefer, as you can see I preferred to cover all sides of my suitcase!
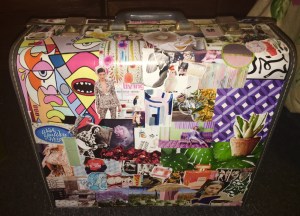
Above: one side of suitcase
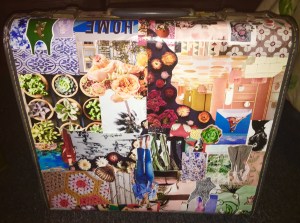
Above: Other side of vintage suitcase
4. Drying Time
I prefer to leave it a few days to dry completely. Each day check that there are no pictures lifting off or peeling at the edges.Ensure to glue any flapping edges back on.

5. Finishes
The suitcase is completely dry and you are happy with the look… NOW you can finish the project! Give the suitcase either a clear coat of spray paint or enamel. You will need to do a few coats to protect your images and leave the relevant amount of drying time between each coat. The more layers that you spray on your suitcase, the better the suitcase finish will be. Another option is to cover it with decoupage clear gloss if you prefer a thick glass coating. Then you will need to leave it a few days again.
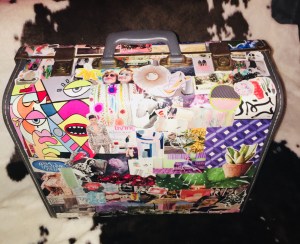
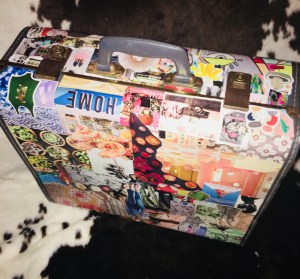
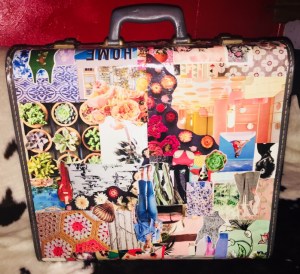
Image above: finished product
The above process can be followed to decoupage any item.
Have you ever decoupage a product? Send me photos, I would love to see them!
Back soon….
Ridiculously Retro xx

Such a cool idea!!! Love it xx
LikeLiked by 1 person
Thanks
LikeLike